If you have hooded eyes and have been longing to create a beautiful cut crease but are unsure about where to cut the crease, I have the perfect solution for you. In this step by step Hooded Eye Makeup tutorial, I’ll guide you through the easiest and most flattering cut crease technique specifically designed for hooded eyes. By following these simple steps and incorporating the following tips, you’ll achieve a stunning cut crease look that enhances your eye shape. Let’s dive in!
What if I told you this is the easiest and the most flattering cut crease on hooded eyes? If you cannot see much of your lid space because it’s hiding under some extra skin, which we call the hood, then you might have hooded eyes. But worry not, at Mybreezylife, I’m here to show you how to achieve a mesmerizing cut crease look on hooded eyes, step by step.
Step by Step Hooded Eye Makeup
Table of Contents
Step 1: Priming the Lid
To begin, apply the Milani conceal in the shade 145, or whichever matches your skin tone, all over your lid as a base. This will even out the skin and provide flexibility to work on your lids. Before the concealer settles, lightly set it with a translucent powder such as Bare Minerals Translucent Powder. This step ensures a smooth and long-lasting eyeshadow application while preventing creasing.
Step 2: Cutting the Crease

Using a black eyeshadow like “Let’s Do It” from Colourpop, take an eyelash curler and dip one end into the black eyeshadow. Position the eyelash curler in the inner corner of your eye, stamping it on your lid. This technique eliminates the guesswork of where to cut the crease, as the lash curler acts as a guide. Use a clean blending brush to soften and blend the black eyeshadow for a seamless transition. Remember to blend the edges thoroughly to avoid any harsh lines.
Tip: When cutting the crease, consider the shape of your hooded eyes. For a more lifted appearance, cut the crease slightly above the natural crease line. This technique creates the illusion of a larger lid space and enhances the overall eye shape.
Step 3: Softening the Crease
From the Colourpop Sweet Talk palette, dip into the shade “West Side,” a softer brown shade, and apply it directly over the black, blending it out. This step softens up the crease while maintaining the definition of the black and brown shades, creating a beautiful ombre effect. Use a larger blending brush, like the one from ELF, to further blend and soften the eyeshadows for a blown-out effect.
Tip: Blending is key to achieving a seamless transition between colors. Use a fluffy blending brush to blend the crease color with a soft back-and-forth motion. Pay attention to blending the edges to avoid any harsh lines.
Step 4: Creating a Wing and Enhancing the Lid Space
Using a tad bit more concealer, clean up underneath the crease to achieve a clean and defined look. Then, use sticky tape as an extension of your lower lash line in the outer corner. Apply more of the brown eyeshadow, pushing it from the tape towards the inner part of the lid, using a blending brush. The tape acts as a stencil, making the cut crease technique even easier. This technique also creates a soft wing, which is more flattering for hooded eyes.
Tip: Utilize sticky tape as a handy tool for creating precise and clean edges. Place a small piece of tape diagonally from the outer corner of your eye to the end of your eyebrow before starting your eye makeup. This helps create a defined wing and keeps the eyeshadow application neat.
Step 5: Lower Lash Line and Eyeliner

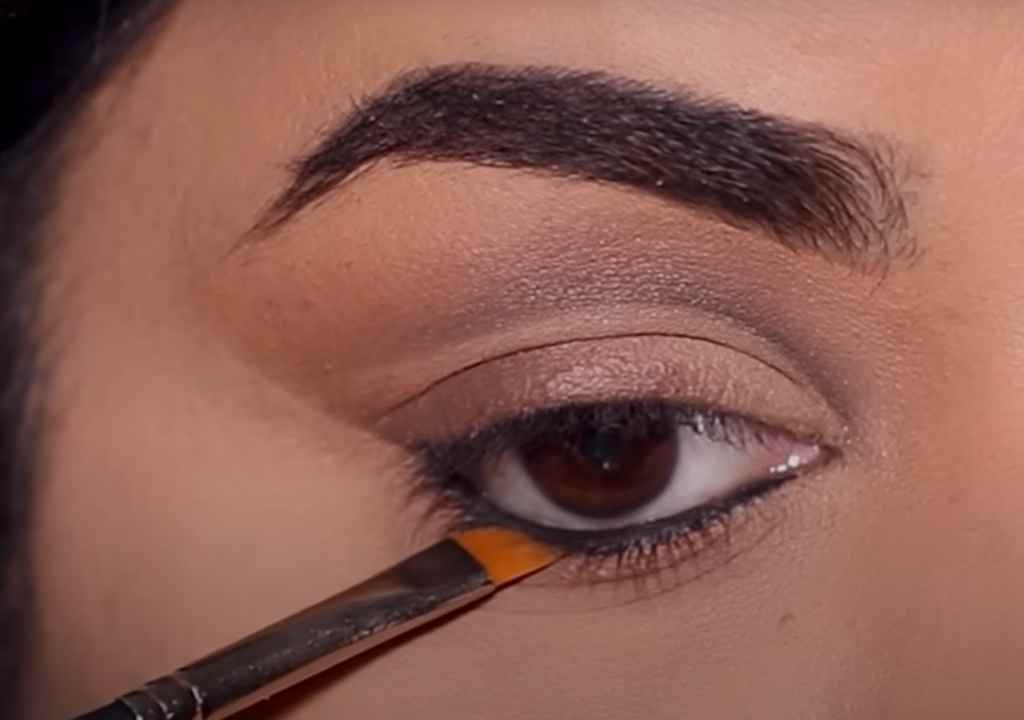
Smoke out the brown eyeshadow on your lower lash line using a flat definer brush. Since we’re creating a neutral cut crease, any color eyeliner can be used on your waterline. Apply a black eye pencil, like the Black Kohl Liner by Haus Labs, and lightly smudge it with a small angled brush. Create a wing in the outer corner, extending the liner along the lash line.
Tip: When applying eyeliner, opt for thinner lines or smudged liner along the lash line to avoid overpowering the hooded area. Consider tightlining the upper waterline for added definition.
Also read: How to do Cat Eyeliner & Reverse Cat Eyeliner
Step 6: Adding Glitter and Finishing Touches
Using a flat shader brush, apply a beautiful pressed glitter, such as “Prima Drama,” right below the cut crease. Press the glitter onto your lid directly; there’s no need for adhesive or a base. The glitter adds a touch of glam to the look. Finish off with your favorite mascara and lashes, such as the Bare Minerals Strength and Length Mascara and the Brazen lashes by Black Label. Lashes are optional; mascara alone will still make your eyes look stunning.
Tip: Experiment with different eyeliner techniques to find what works best for your eye shape. Opt for a softer wing that follows the natural curve of your upper lash line. This wing shape complements hooded eyes and doesn’t interfere with the hood, creating a more balanced and flattering look.
Congratulations! You’ve successfully achieved a gorgeous cut crease look for your hooded eyes. By incorporating these tips into each step, you’ve enhanced your makeup application and created a stunning eye look. Remember to practice, experiment, and have fun with your makeup. Enjoy rocking your new cut crease look and embrace your beautiful hooded eyes.


